I didn't touch BSG 8 (a Singer 9 Longtail) until after Christmas (don't get me started about Brexit, elections and the amount of ‘valuable’ work it created for this humble public servant - sorry, rant over). But in January I realised I had to bite the bullet and get on with moving the battery from above the passenger's feet (yes, I know - but that's another story). So, first things first, get it up on the stilts and remove the wheels. Should be straightforward enough. But not when a castellated nut falls out of the offside rear hub as the wheel is removed. How did that happen? What more should I be worried about?!?
So, being a modern chap I headed to the SOC Facebook page to seek help. And I wasn't disappointed.
 First, there were no split pins in either of the rear nuts. This was quite a surprise seeing as dad had usually been very particular about everything. What you need to do is tighten the nut to 60 foot-pounds and then slacken off just enough so that one of the slots in the nut lines up with the hole in the hub and hole in the half-shaft. I used a pair of old (that’s very important for good marital relations) tweezers to guide a split pin through the hole in the hub, the slot in the nut and the hole in the half-shaft. I then used a 90° pick-tool to draw back one of the halves of the split pin, and a screwdriver to flatten back both ends.
 And then the same on the rear nearside, but didn't need to do anything on the front wheels because dad had fitted split pins in these.
Robert Elliot says he’s seen cases where the hub has been replaced and the hole in the hub does not align with the hole in the half-shaft, making it impossible to fit the split pin. If this is the case with your car he suggests that you fit a nyloc nut, clean the thread, apply loctite to the half-shaft, fit the plain washer followed by the nyloc nut and tighten to 60 foot-pounds. You should then allow the loctite to set for 24 hours before use.

 But also … when scrabbling about underneath, the state of some of the metalwork clearly had to be addressed. Again, I had treated it all thoroughly a couple of years ago, but I suspect I hadn’t cleaned and degreased some areas sufficiently, leading to some new paint now peeling off. Fortunately, although the quantities of the POR-15 calliper treatments were quite small, they were just enough for the underneath sections (and I assumed the high-temperature quality of the paint, although unnecessary underneath, would be fine).
 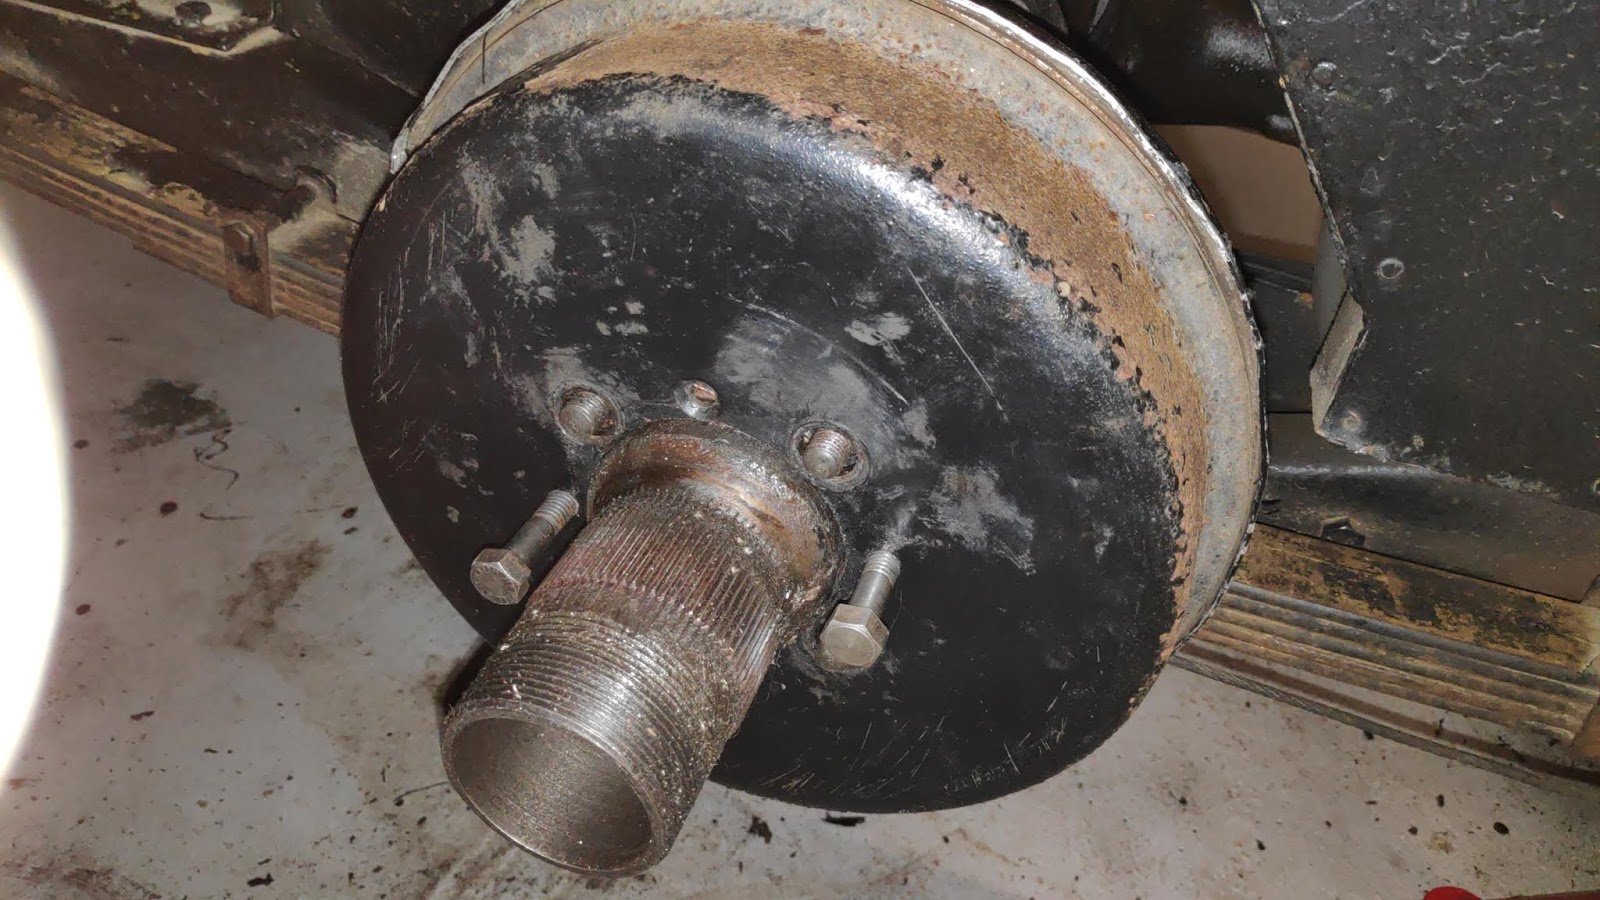 Final job was to put the drums back together, but that offside rear drum again caused problems - as it has always done. It’s consistently been the most difficult to get off (hint - screw in a couple of bolts to the holes in the face of the drum to gradually force it off - see the picture). But even when on it was sometimes quite sticky (and, yes, the rear adjusters were properly set). So I thought I would try rotating it 90° so that each hole was presented to the next bolt round on the hub. And that was when I noticed that the drum doesn’t sit true depending on which rotation of hole and bolt alignment is used (i.e. on one of the four alignments I could wiggle the drum from side to side slightly). Aligning the four holes and four bolts differently and without any wiggle made fitting the drum much easier and seemed to remove the stickiness. I do worry that this problem indicates a more serious issue, but it seems OK for now, so I’ll turn a blind eye … until one of you good folks point out the error of my ways! I’m also wondering if the stickiness, wiggle and loose castellated nut might all have been connected to in some way.
Last observation about setting the adjusters at the back of each rear brake. I noticed that once I thought they were set properly, after I pulled the handbrake on and off the wheel would sometimes still be ‘braked’. Solution to that was to also pull the handbrake on and off when setting each adjuster, so that the brake drum could still rotate after the handbrake had been pulled on and then released. Again, conscious there might be an underlying problem, but if it seems fixed, why go looking for more trouble.
Of course, ignoring problems is not to be recommended. Which is cue for a confession. For most of last year there was a strange rattling noise from the offside rear, which I couldn’t pin down from simple visual inspection. It’s now clear it was that castellated nut bouncing around inside the hub. Doesn’t bear thinking what might have gone wrong (especially when competing, for the first time, in the Bo’ness Revival Hillclimb back in September).
I mentioned earlier that I’d consulted members via the Singer Owners' Club Facebook page. So, I must acknowledge the helpfulness and good advice proffered by Keith White, Chris Allard and Robert Elliott. But, in time honoured-fashion, they’re not responsible for any errors in execution or in the account - these are all mine.